
Biometric Security System Installation Guide
Biometric access control systems are no longer reserved for high-security labs or sci-fi films. Today, they’re a reliable, increasingly common way to manage secure entry across schools, hospitals, city buildings, and corporate campuses. From fingerprint scanners at employee entrances to facial recognition in executive suites, biometrics streamline access while reducing the risk of lost or shared credentials.
In this guide, we’ll walk you through the full installation process—from unboxing the hardware to enrolling your first user. We'll also include answers to frequently asked questions at the end.
Step 1: Choose the Right Biometric System for Your Facility
Before installation, verify that your biometric reader is compatible with your existing access control infrastructure. Consider whether you need a standalone unit or a cloud-based solution that integrates with your broader security ecosystem.
Common biometric options:
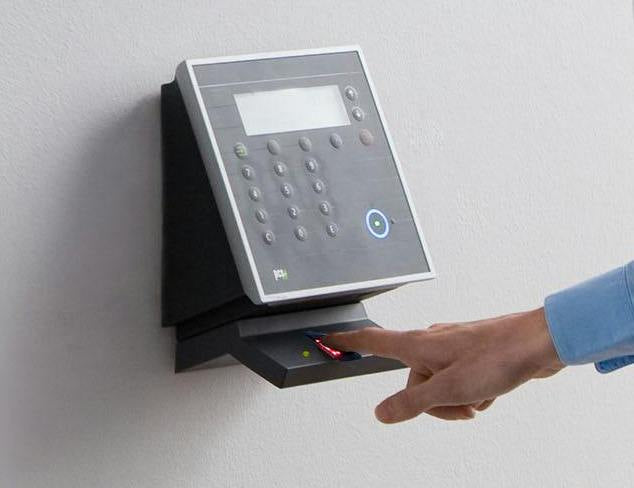
- Fingerprint readers: These are the most widely adopted biometric devices for commercial settings. Users scan a single finger—usually the index or thumb—which is matched against stored templates. They are affordable, quick to install, and work well in controlled indoor environments. However, moisture, dirt, or cuts on the skin can reduce accuracy.
- Facial recognition terminals: These systems use a combination of infrared imaging and 2D/3D mapping to analyze facial features in real-time. They work well in high-traffic entry points, especially where contactless access is preferred. Many models now support mask detection, liveness checks to prevent spoofing and rapid authentication.
- Iris scanners: Iris recognition provides some of the highest levels of accuracy available. Each person's iris has a unique pattern that remains stable over time. Scanners capture the pattern using infrared light. These systems are typically used in restricted areas where identity certainty is critical, such as server rooms or laboratories.
- Multimodal readers: For facilities that require layered security, multimodal devices combine two or more verification methods, such as face + fingerprint or card + PIN. These readers increase flexibility and reduce the chance of access failure due to poor biometric reads. They also provide redundancy and enhance security policy enforcement.
Step 2: Prepare the Mounting Location
Choose a clean, accessible area near your entry point. Location affects performance and durability, so take these into account:
Mounting considerations:
- Eye-level placement for facial/iris recognition: Placing the reader at eye level ensures optimal angle and distance for accurate facial or iris capture. These systems rely on visual alignment to match biometric data effectively, and improper positioning can result in failed scans or increased false rejections.
- Waist-height for fingerprint scanners: Positioning fingerprint readers around waist height provides ergonomic ease of use for most adults. It also helps maintain consistent finger placement on the scanner, improving both the speed and accuracy of enrollment and authentication.
- Out of direct sunlight or rain (especially for outdoor units): Harsh environmental conditions can impair biometric sensors. Direct sunlight can interfere with infrared or optical scanning, while moisture can damage devices or distort fingerprints. Install under a protective overhang or in a weather-rated enclosure when outdoors.
- Near a powered lockset or maglock: For seamless access control, the biometric reader should be located close to the door hardware it controls. This minimizes wiring runs, reduces latency in unlocking, and simplifies integration with strike plates, maglocks, or electrified levers.
Use the provided mounting template to drill holes and route cables. Wall anchors and a weatherproof backbox may be necessary for exterior installations.
Step 3: Connect Power and Wiring
Proper wiring ensures stable operation. Most biometric readers require the following:
Wiring breakdown:
- Power: 12VDC or Power over Ethernet (PoE)
- Data: Wiegand or OSDP for panel communication
- Network: Ethernet for web-based configuration or remote management
Label all wires and use proper connectors (such as WAGO terminals or crimped ferrules). Once wired, test for continuity and correct voltage before powering up.
Step 4: Integrate with Your Access Control System
This is where the biometric reader connects with your broader access control system:
For panel-based systems:
- Assign the reader to a door controller input
- Configure reader mode (entry, exit, dual-authentication)
- Link to specific access groups or user profiles
For cloud-based systems:
- Assign an IP address to the reader
- Enroll the device in your cloud dashboard
- Match doors to zones or departments for reporting
This step ensures the biometric device can make access decisions and log events appropriately.
Step 5: Configure the Biometric Reader
Log in to the device’s admin dashboard using a PC or mobile interface. Default credentials are usually printed on the device or quick start guide—change these immediately.
Configuration tasks:
- Update firmware
- Adjust biometric sensitivity (false rejection vs. false acceptance rates)
- Enable secondary access methods (PIN, RFID card)
- Set schedules for active hours or user groups
For facial recognition, ensure the onboard camera is calibrated for lighting and angle.
Step 6: Enroll Users
User enrollment is critical for biometric accuracy and usability. Depending on the device type, enrollment may be done directly on the reader or through a connected enrollment station.

Fingerprint Enrollment:
- Clean the finger and sensor surface
- Scan the same finger multiple times
- Label the user with a name and unique ID
- Assign the user to access level or door group

Facial Recognition Enrollment:
- Ensure proper lighting and distance (18–24 inches)
- Avoid hats, masks, or glasses during capture
- Capture multiple angles to improve match quality
- Confirm photo match score before saving

Iris Enrollment:
- Align eyes with camera prompts
- Hold steady for 1–2 seconds
- Validate with a test scan immediately after
Test each credential after setup to confirm successful authentication.
Step 7: Test, Audit, and Maintain the System
Testing:
- Simulate entry attempts with authorized and unauthorized users: This ensures that the biometric system accurately identifies valid users while rejecting unauthorized individuals. It helps uncover potential misconfigurations, reader placement issues, or software glitches before they impact daily operations.
- Check backup credentials (card or PIN): Always verify that secondary access options function properly. If a user cannot authenticate via biometric input due to injury or equipment error, a card or PIN should serve as a reliable fallback.
- Confirm event logs populate correctly in your dashboard: This validates that the reader is properly integrated with your access control software and that access events are being tracked in real-time for compliance and audit purposes.
Audit settings:
- Enable time-stamped logging: Time-stamped records allow administrators to trace specific access events—critical for investigating incidents or tracking patterns. These logs support regulatory compliance and internal accountability.
- Configure alerts for failed attempts or offline status: Setting up alerts allows your security team to respond to access issues or device malfunctions immediately. This can help deter tampering, troubleshoot network issues, or identify repeated failed entry attempts.
Routine maintenance:
- Clean optical sensors weekly: Dust, oils, and environmental debris can interfere with biometric accuracy. Regular cleaning helps prevent scanning errors and extends hardware lifespan.
- Update software quarterly: Firmware and software updates often include security patches, performance improvements, and new features. Staying current reduces vulnerabilities and ensures reliable system performance.
- Re-enroll users after significant physical changes: Changes such as cuts, facial hair, aging, or even eye surgery can affect recognition accuracy. Periodic re-enrollment ensures continued reliability and smooth access for all users.
Frequently Asked Questions (FAQ)
Q: Can biometric readers be used outdoors?
A: Yes, but choose weather-rated models and install them under cover. Consider facial recognition over fingerprints in cold or wet climates.
Q: What happens if someone can't enroll due to fingerprint or facial issues?
A: Most systems support secondary credentials like RFID cards or PINs for backup access.
Q: How many users can I enroll?
A: That depends on the model. Some units support 500 users, others scale to 10,000+ with cloud storage.
Q: Is biometric data secure?
A: Modern readers encrypt biometric templates, not raw images. Make sure to enable encryption and use secure networks.
Q: What if the power goes out?
A: Systems should include battery backup and fail-safe/fail-secure lock options.
Need Help with Installation or Setup?
At Puget Sound Hardware, we do more than sell biometric readers. Our team handles installation, configuration, user training, and ongoing support. Whether you're upgrading one door or outfitting an entire facility, we deliver end-to-end solutions with zero subcontracting.
Contact us today to schedule a site visit or request a quote.